Showing posts with label The Cyclemotor Project. Show all posts

Sunday, 1 April 2012

Back To Square -1

Had another of those restless wide awake imagineering nights last night.
I can usually build very complex imaginary constructions during those long watches of the night but last night was all about de-construction.
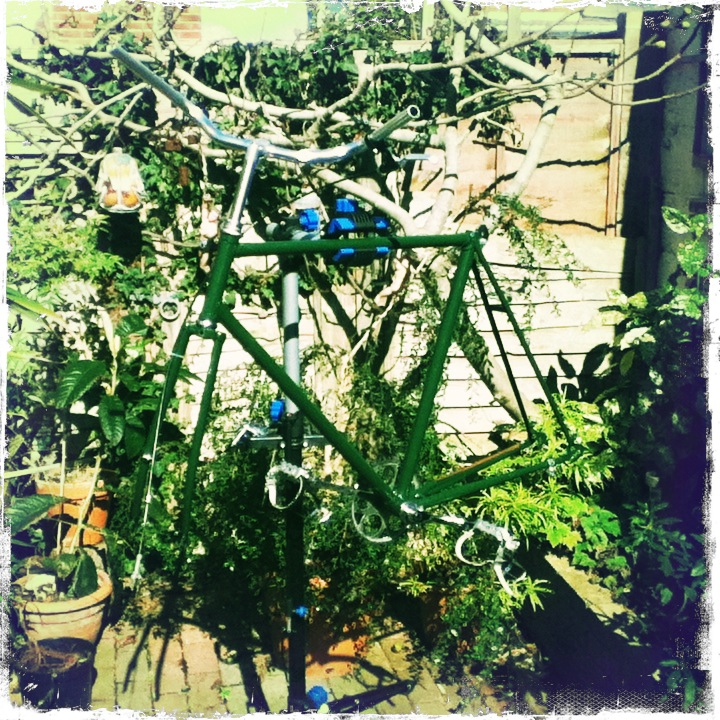
Guess what I was de-constucting?
There, that's better.
Once the engine was removed I was alarmed at the amount of damage it had inflicted on the down-tube which now looks as if it's been given several hefty thumps with a lump hammer.

I've changed my mind about this bicycle so many times I can't remember if I like it or not.
On the evidence of the ride along the prom to the pier I think I'm in a 'liking' phase at the moment and shall change my allegiance from the Motorized (sic)Bicycle Forum to the RatRod Forum which deals with all things hastily-cobbled-together-bicycle.
Riding it is a gentle 'hello sky, hello birds, hello sea' pleasure.
It's not fast, it still can't be ridden 'look, no hands' but that's not what's required on a sunny day in Bognor Regis.


A side issue of this deconstruction/re-imagining is what to do with the 5 litres of 2 stroke mix I now have in a plastic container (N.B. not a 'jerry' can).
I won't be asking any politician for advice though.

I've just remembered something from a long time ago!

I'd be about 10 years old, helping out in my father's garage.
We were decanting 5 gallons of petrol from a proper jerry-can into the underground petrol storage tank via a large funnel.
A customer stood watching us.
He asked my father if he didn't consider this practice somewhat dangerous.
'No' said my father removing the cigarette from his mouth and extinguishing it in a small puddle of petrol that had spilt on the garage floor.
His point being that it's the vapour that's (in)flammable not the liquid.

By the way the customer walked (and the smell) as he left I think he'd just shit his pants.
Oh, how we laughed in those far off days.

Tuesday, 27 March 2012

The Cycle-Motor Project: (enough already!) Epilogue.

Early one morning, just as the sun was rising...
I pedalled the Cycle-Motor out to the cycle-track between Felpham and Barnham.
Riding this bike 'unassisted' is like stirring porridge with y'legs.
Or at least it was until I adjusted the clutch so it disengaged fully.

The bike starts after about two pedal revolutions so long as it gets a bit of momentum up first.
I'm not giving it full throttle as it's still running in but, even at half throttle, it has quite a turn of speed and an alarming high frequency vibration that gives the sensation of having knocked one's 'funny' bone.

I made this little film:
I buzzed up and down the track, avoiding the dog walkers and their dogs and what the dogs left behind (I blame the owners, not the dogs).
I stopped to have a chat with a bloke who seemed very impressed with the bike.
Buzzed up and down a bit more then decided to return home.

I noticed the right-hand pedal was fouling the engine casing and assumed the mounting must have slipped.
I was wrong.
One of the rear engine mounts I'd fabricated from mild-steel treaded studding had snapped but, as my progress hadn't been impeded, I continued on my way until the other mounting snapped under the strain.

I had a feeling the rear mounting was going to be the weak-spot.
My plan now, or for the future, is to make a proper engine mounting from a block of aluminium I have and get some hardened steel mounting bolts.
It won't be happening anytime soon.

O.K. I won this one but, a bit like a football match that's won by the other team scoring an own goal, not well.
I'm so tempted to remove the engine altogether and just enjoy riding the bicycle.

As I pushed the Cycle-Motor the last mile home I heard a buzzing above me.
A motor assisted para-glider passed over my head.
Hmmmm....

Now if I......

Saturday, 24 March 2012

The Cycle-Motor Project: A Sleepless Night, An About Face, Several Frustrations and An Ending.

My re-think of the bike caused more problems than I could sensibly fix.
The final straw was exhaust clearance or, the lack of it.
No matter how I adjusted the engine position either the pedal fouled on the exhaust pipe or the exhaust pipe fouled the bottom bracket shell.

A 4am this morning I was still wide awake trying to imagineer a solution but couldn't do it.
By 06:30am I came to the inevitable conclusion that the re-think was a failure and the only alternative was to use the Black Tractor frame.

I started work on the bike at 13:00 and in half an hour had this:
I rode it around for a while and it's actually a very nice, comfortable and relaxed bike.
I got the engine mounted:
I reckoned on about another hour before a test ride but failed to take one thing into consideration:
Linda had just come off the phone having arranged to collect a new washing machine and guess who she's decided is going to do the heavy lifting?

Two hours later, new washing machine fitted and £20 lighter after buying a heavy-duty chain-cracker, I'm back to work.
The new chain-cracker turns out to be to heavy-duty for the 415 chain but I persevere and finally assemble the chain only to discover the split-link.
I nearly cracked.
Where did that split-link hide when I carefully examined the chain to make sure it didn't have one the other day?
Several deep breathing exercises later I've regained my composure and return to the task in hand.
Another hour later and I have created this:
It's vastly improved from last weeks version of this build.
New tyres, better handlebars and several issues that only manifested themselves during the re-build have been dealt with.
The rear horizontal dropouts are a safer option for a motored-bicycle as the wheel can't be pulled out of the frame.
The wheel-base of this frame is much longer than the 'Dobson's' making the ride more stable and comfortable.
I've still got to deal with the CDI mounting and I'm on the hunt for a suitable metal box to house it in.
In a perfect world I'd fit the cylindrical fuel tank and some better handlebar grips but I'm in no hurry to do anything else at the moment.

So, does it work?
Well, yes it does.
Once it gets warmed up it runs a lot better than the film suggests.
I'm running it on a 16:1 fuel/oil mix at the moment. Once I get to the 20-25:1 mix it should run even better.

That's it, The Cycle-Motor Project is at an end.
I will, in time, compile the whole project and publish it on it's own page entitled "WARNING!! On no account read this page!"

I'm tired, I'm going to bed.

Wednesday, 21 March 2012

The Cycle-Motor Project: The Art of the Possible.

After walking away from the shed yesterday, ready to attack the bike with a hammer, this evening I took a deep breath and decided to do just the things it was possible to do without causing myself undue stress.

I fitted the fuel tank.
I fitted the anti-frey cap on the clutch cable.
Using a zip-tie I experimented with where I'd like to position the CDI unit.
Then my stupid gene kicked in and I shortened the new fuel pipe by about half an inch to much.

Still, it's starting to look really good:
Tasks remaining to be accomplished:

  1. Mount CDI unit.
  2. Extend wiring to CDI unit and secure.
  3. Buy a heavy duty chain-cracker.
  4. Lengthen drive-chain.
  5. Fit drive-chain tensioner.

Tuesday, 20 March 2012

The Cycle-Motor Project: And On, And On, And On.....

I bought a new chain-cracker:
The splines bent the first time I used it...
I managed to shorten the drive-chain, by to much.
I dug the original drive-chain out and I'm hoping that it's long enough to do the job.

The bike's actually looking quite good:
But I'm beginning to hate it with a passion that would melt a mountain.

I think I'm going to leave it alone for a couple of days.

Monday, 19 March 2012

The Cycle-Motor Project: One More Time!

Here I go again.
I'm determined to complete this project and finally draw a line under it.

First off I stripped the 'Dobson' down to it's bear essentials:
There's a bicycle in there somewhere.
I then stripped the Black Tractor down.
One disturbing discovery was what had happened to the tubing I'd chosen as a fuel line. It, more or less, fell apart in my hand as I went to unscrew the hose-clips that held it on:
That could've been very nasty.
I busied myself through the sunny afternoon dealing with all the little problems that threw themselves up.
Then I hit an impasse.
I needed to shorten the drive-chain.
I put the chain-cracker in position, tightened it up and it promptly fell apart.
This made me angry.
I stood up, knocking the front wheel in the process, and the handlebars swung round and biffed me in the left eyebrow.
It was a moment similar to when you stand up bringing your head into violent contact with the corner of an open cupboard door.
"FUCOWWW!!" as we say in this household.

One step forward, two steps back.

Sunday, 18 March 2012

The Cycle-Motor Project: Errrr, Not Happy.

Today, whilst buzzing around the local streets making small adjustments to the cycle-motor, a youth on bicycle drew up alongside me, while I was standing still I might add, "Wow! Is that one of those things from the 1950's?" 
Me "No". 
I gev' it an 'and-full' and shot back to my shed.

Having finally got the bike moving I find I'm not at all happy with it.
The major problem being the 'style' I've tried to impose on it.
I used this site for inspiration: The Moped Gallery
Most of the difficulty I've experienced during this build, and the delay in getting it to this stage, has been trying to accommodate the 'style'.

I was so blinded by the desire to make the finished product look like something that could have featured in the Moped Gallery I lost sight of what I should have been trying to achieve, an efficient machine.
The bicycle I ended up using is a poor quality machine of a dated design, and that's being kind.
I could have used something like my current bicycle which, although not great, is light years away from the gas-tubing donkey I chose.

I went up into the attic to do a bit more thinking and to do a bit of work on the 'Dobson', then it dawned me.
The 'Dobson' is, and always has been, the perfect bicycle for this project.
The build quality of the frame is superior, the frame angles are much better and the powder-coating I had applied to it is more robust than the thin layer of nail-varnish on the current frame.
On further consideration it makes even more sense to return the Black Tractor to it's original condition and fit the engine into the 'Dobson' (an afternoon's work at most in both cases).
This plan also means I can sell the Black Tractor, which I initially had misgivings about, then liked for a while, but very quickly cooled on again as it revealed it's many faults.

This is a temporary blip.

Friday, 16 March 2012

The Cycle-Motor Project: It's Alive! (Updated)

WIN!

There's still work to do but, if I did nothing else, it works!

(Thanks to Mr. Wills for pointing the camera at me as I whooshed back and forth.)
Update:
Having established that the bike works I now have to consider the refinements.
There's a cylindrical fuel tank to fit.
Mud & chain-guards will be fitted.
I have to repair the CDI unit (coil) as the mounting disintegrated within 10 minutes of first starting the engine (it's held on with insulation tape at the moment).
I don't need to fit a kill-switch, all I need to do is close the choke and it stops straight away.

The handlebars will be replaced but I have to find the 'right' set.
Much as I respect Mr. Old Fool's opinion (see comments on previous post) I have to disagree with him about 'swept back' bars.
I suggest one of the, many, differences between the U.K. and U.S.A. is riding position.
In the wide-open U.S.A. where roads are long & straight the 'easy-rider' position makes sense.
Here on the twisty-turny roads, made by that rolling English drunkard, nose to the front wheel is probably more appropriate.
We'll see.

Monday, 12 March 2012

The Cycle-Motor Project: The Final Hurdles.


A leisurely afternoon's tinkering has taken me a little closer to the end game.
I managed to get the drive chain aligned but it still 'jumps' on the engine sprocket.
I'm ignoring that problem for now.
I changed the handlebars:
The bars aren't bad but I don't like the stem. Still, it's only a temporary measure.

After my little victory with the throttle I crashed back to earth with a bump.
Whilst fitting it on to the handlebars I over-tightened it and the crappy black-plastic housing cracked.
It still works, so long as it's not used with vigour, but I decided to replace it.
A quick eBay search and the desired item is on it's way.
Having completed the purchase, I did a little more 'window-shopping' and noticed there's a company in Bognor that supplied the same item and it's only up the road a mile.
Ah well.

All that's left to sort out, to make the engine run, is a H.T. lead.
All that's left to sort out, to make the engine stop, is a kill-switch.
Just don't ask about the 'Kill-Switch' debate, really, don't.

Saturday, 10 March 2012

The Cycle-Motor Project: Oh, When Will It Ever End?

In the last thrilling instalment of The Cycle-Motor Project (see here) the bike looked like this:
It needed a drive chain (done).
It needed 2 clips for the fuel line (done).
It needed the kill-switch connecting (I'm working on it).
It needed a longer H.T. lead to the spark-plug (Monday).
It needed some anti-fray ferrules for various control cables. (Monday).
It needed fuel (as soon as the to-do list is complete).

Several more little 'issues' have appeared since I abandoned the build last May.
I bought a new drive-chain that has to be tensioned by a horrible piece of steel and a crappy plastic jockey-wheel.
Today I tried to align all the bits but had to give up when the process became so frustrating that my vigorous swearing began to frighten the neighbour's children.

I don't like the handlebars and I'm going to fit the bar that I took off my winter bike.

The one significant success I had today, and it really was a break-through, was getting the throttle-cable working properly.
(I haven't mentioned the throttle-cable before because I hadn't realised it wasn't working correctly.)

And that small victory tipped the balance of the day.
The sun came out, happy little birds began to sing, and I could finally see my way to the end of this long road.

Now the plan is to have the project finished to a working standard by the end of next week.
So I probably won't post about it again till late 2013.

I suffered a further misfortune later in the afternoon.
I was moving the 'Dobson' out of the shed and into the attic, where I intend stripping it down to give it a super-service.
I didn't fully locked the attic access ladder into place and it collapsed from under me as I was two thirds of the way up with the 'Dobson' on my back.
Yes, it hurt.
As my Father used to say to me when ever I did something like this during my childhood, "You won't do that again, will you?".

(No, I f*^king won't!!!!... arrrrhhhh, whimper, whimper.)

Friday, 6 May 2011

The Cycle-Motor Project.

Today marks a break-through in my attempt to build a Cycle-Motor or, as Linda describes it, death-trap.
It now functions perfectly well as a bicycle.

To make it into the finished article the following jobs need to be completed:
  • 01) Connect the electrics up.
  • 02) Fit drive chain (having first purchased around another 6 in. of chain).
  • 03) Fit a longer piece of spark plug cable.
  • 04) Fit anti-fray ferrule on clutch cable.
  • 05) Fit two hose clips to the fuel line.
  • 06) Insert fuel.
With good luck and a fair wind I should be blogging from my hospital bed by Sunday.

Wednesday, 26 January 2011

Cycle-Motor: The Clutch Cable.

It's easy to over-look the little jobs that get done on a build.
The procedures and connections that one might assume people would take for granted.
The clutch cable, as supplied, is far to long.
So long in fact that it may just be possible to stretch fabric over over the loop it forms and make something like a butterfly wing out of it.
A standard cycle control cable is extended by a shorter cable (the type used at the derailleur end of a gear cable) with an adjuster stuck between the two.
At the lever end of the cable a ferrule has been added for no other purpose, it seems, than to stop the outer cable from fitting into the adjuster on the lever.
So, here's a picture of the bits I removed:

There's a spring on the clutch cable to protect it from the heat produced by the engine which I nearly forgot to replace and a smaller spring that protects the inner cable from your guess is as good as mine.

The finished job:

I moved to say that air filter cover has just got to go and I know I've got a copper fondue heater that would do the job nicely if only I could remember where I put it.
The brass cable clamp is tightened down so much I doubt if I'd be ever able to remove it again but this is a necessary precaution as the 'pull' on the clutch is quite hefty (for a small engine) and I don't want anything 'slipping':
 All that now remains to do is to run some solder into the end of the cable to stop it fraying and an end cap fitting so it doesn't end up stuck in my leg and Bob's y'live in lover.

Wednesday, 19 January 2011

Cycle-Motor: The Backwheel.

I creep tentatively forward.
The fiddly job of fitting the drive sprocket to the wheel.
It involves passing a bolt through the sprocket, a rubber mount, the wheel spokes, another rubber mount, a metal plate, a flat washer, a spring washer then into a brass domed nut nine times.
I managed to drop each item listed above at least once.

The worry here was that the wheel wouldn't align correctly in the frame.
Fits perfectly and looks 'right':
The next hurdle involves finding an extra length of 415HD chain for the drive side.

Sunday, 16 January 2011

Sundry Mortifications No17: Another Year, Another CycleMotor Plan.

I can't remember when it was that the idea of building a cyclemotor came to me.
Oh, wait a minute, yes I can.
It was when I saw a picture of a Felt 1903 Motored Bicycle similar to this one:
The 1903
The major difference between the model that made my heart beat faster and Ridley's version being the addition of a copper fuel tank.
My blog was riddled with my various attempts to build my take on the cyclemotor.
All of them, for one unsurmountable problem or another, failed.
(I deleted the posts out of shear embarrassment and frustration.)
The last nail in the coffin was pedal clearance, or lack of it, on the side of the engine.
I put the engine in a box, put the box in the loft where I couldn't see it and forgot about it.

This evening I went into the loft to start doing a winter rebuild on the Black Tractor.
I saw the engine and,  just out of curiosity, offered it up to the frame.
Then the solution hit me.
Lift the engine to a point on the down tube where it clears the pedals then extend the rear engine mounting studs till they reached the seat tube:
                        
It works!
I'll have to add some nuts and washers at the engine end to make sure the studs don't work loose but this is the answer!
I messed about for around and hour fitting bits and bobs to the frame and voila! Here's a really bad picture of what I ended up with:
There are some small hurdles to get over but the solutions are all sorted out in my head.
So, here I go again building a machine that I won't be able to use as transport on the roads of Great Britain.